 |
| I SPY DIY |
Showing posts with label DIY. Show all posts
Showing posts with label DIY. Show all posts
Monday, August 8, 2011
DIY chain bracelet


Homemade Cupcake Frosting !
 |
| Joy in the Jumble |
I think I'm addicted to food ... Here's Amanda from Joy in the Jumble's homemade cupcake with Home made frosting ( which looks amazing )!!! im a definitely gonna try it! Check out her website for the recipe.
Friday, August 5, 2011
wide legged pants - DIY Inspiration!!
Look like skirts but they are pants! i love that! sometimes you just want the comfort of wearing pants but this is perfect adding a modest touch to it! plus its soo flowy! absolutely fab!

MaryJanes and Galoshes: Leather Bracelets Tutorial
I found this tutorial on leather bracelets which are so popular now. Im really liking the teal and purple one! another trip to Michael's An easy DIY rather than spending $$ on it..right? As a matter of fact i think i could make a cute belt out of it if i get the right size, what do u guys think?
MaryJanes and Galoshes: Leather Bracelets Tutorial: "The other day my sister in law had a really cute teal braided bracelet on that looked like leather and I loved it! Upon closer inspection i..."

Wednesday, August 3, 2011
DIY jersey necklace
 |
| STYLE FRIZZ |
I had some left over jersey material from a dress I had bought. Being a petite size I have to snip off the bottoms of most dresses and re-hem them :) yea i know.. So I decided to make a jersey necklace with the leftovers. Here are some ideas I found on Google.
 |
| I heart Jeeny's art |
I really like the idea of using it as a head piece like the turquoise jersey (top). I also really liked the braid and rosettes in the other pic. Using those inspirations here's what i made.
Tadaaa!!
 |
| Copyright Fashionablyhijabee.blogspot.com |
 |
| Copyright Fashionablyhijabee.blogspot.com |
There are so many ways to dress this up and change it every time you wear it. Here are two ways i thought to dress it up :
a cute braid with a rosette.
 |
| Copyright Fashionablyhijabee.blogspot.com |
or cute bows with a little bit of tulle.
me thinks me like this look more its super girly!!
me thinks me like this look more its super girly!!
Friday, July 29, 2011
handmade earings!!
So I was at the craft store and randomly I see that all these feathers are on sale, I saw peacock feathers and I've always wanted ones but never got around getting it. So perrrfect opportunity! I bought some and made earrings out of them. I just learnt how to make them so there a bit rough around the edges but never the less yay for me!
SO here is the earing:
 |
| Copyright Fashionablyhijabee.blogspot.com |
Tuesday, July 26, 2011
Neck extension
yay! so finally i made my neck extension!! and it looks fabulously cute! it gives you complete coverage! now finally you can wear lacy or deep neck lines with full coverage!
Here it is:


I made the the shoulders a bit wide cause I wanted that full coverage aspect but honestly you can make it as large as you want.
Here's how I made it:
you will need two measurements:
- from the top of your neck to the bottom.
- from the end of your neck to the end of your shoulder.
if you don't have tape etc to measure:
just use an old t-shirt or turtleneck to measure out your cloth.
So I used half a yard cloth, it works with stretchy cloth cause the turtle neck stays up else it kinda collapses.
Step 1: Fold the cloth in half, and draw out a small neck line (red line). Cut out the bottom equal tot he measurement from your neck top to bottom. Mine was 5 inches leave one extra inch. Making it 6 inches.
Step 2: hand stitch or using a machine stitch a straight line measuring from your neck to the shoulder mine was 11 inches.

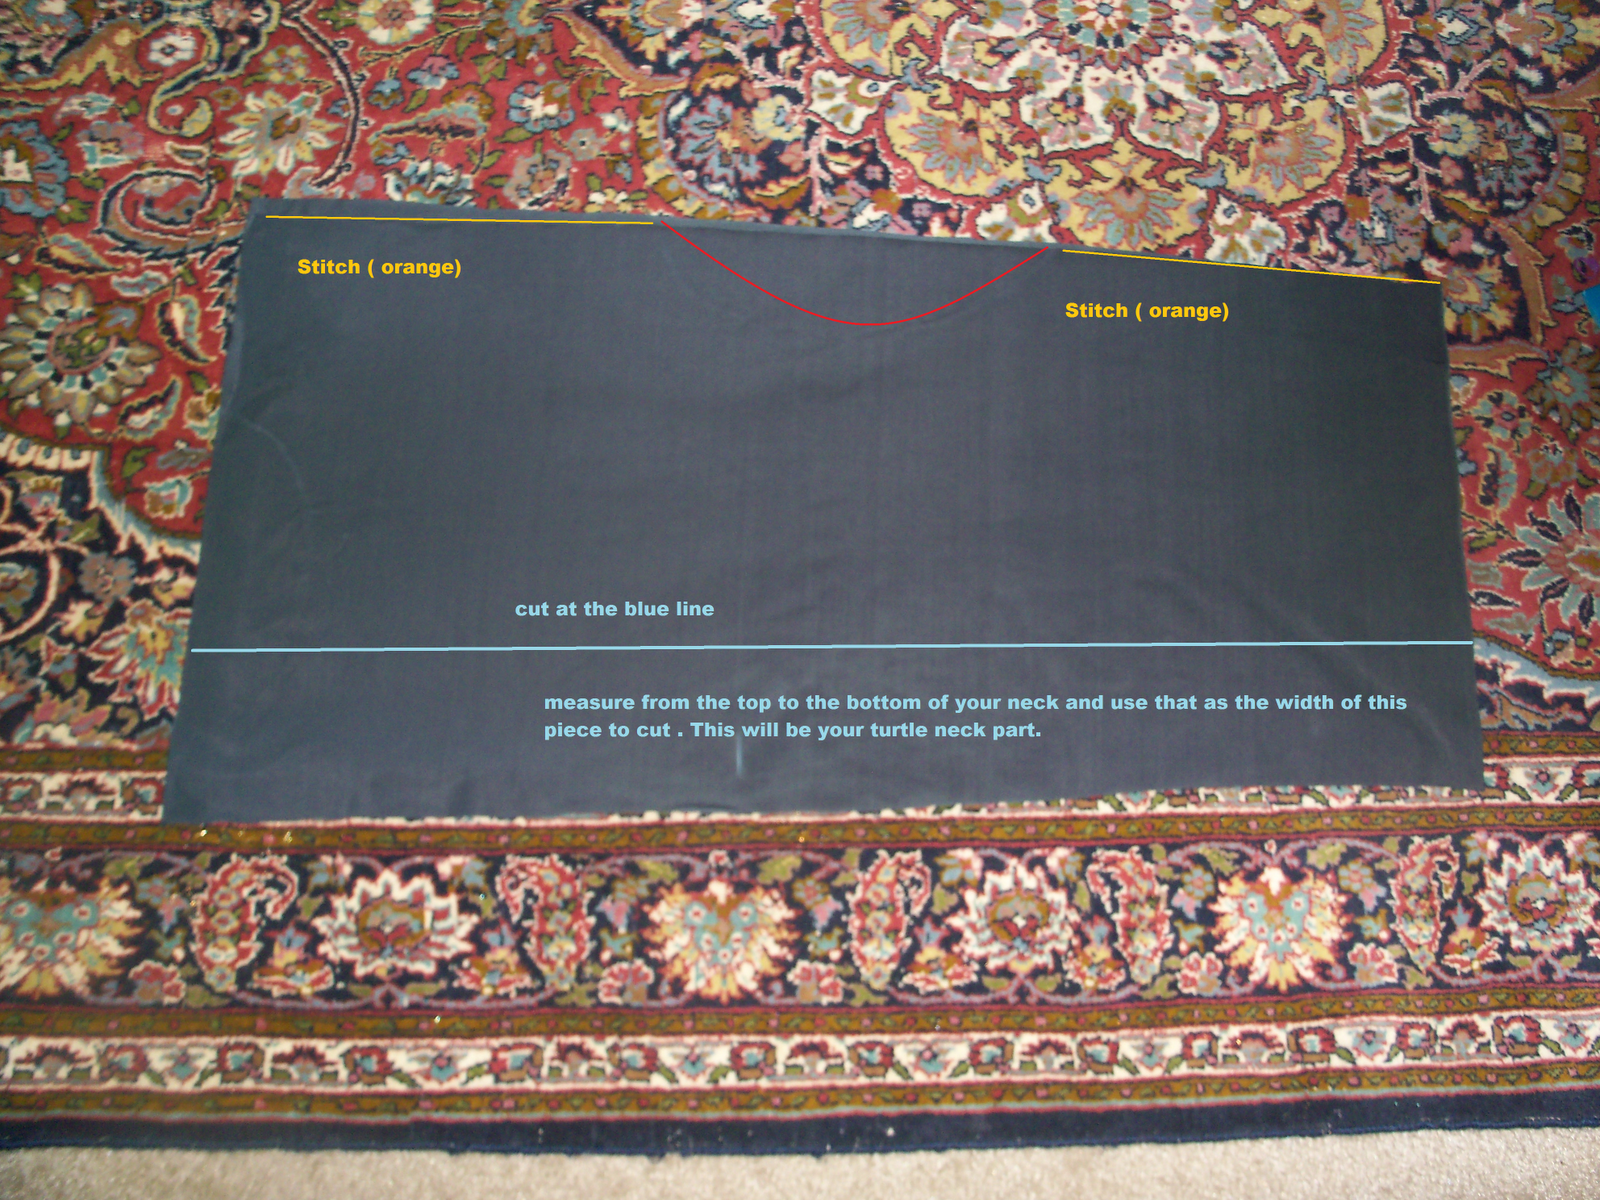

Step 3: Stitch out the three sides of the bottom cloth on the wrong side. Pull out to the right side on the opening shown by the arrow.stitch the opening shut. You should have a circular band.


Step 4: Attach at the neck line by pinning the collar to the neck opening.
Step 5 : try on your neck extension, tighten the turtleneck portion as necessary. make sure not to tighten it to the point where it wont go through your head.
Finished!!! :

Please share your ideas or how to improve this procedure :)
Subscribe to:
Posts (Atom)